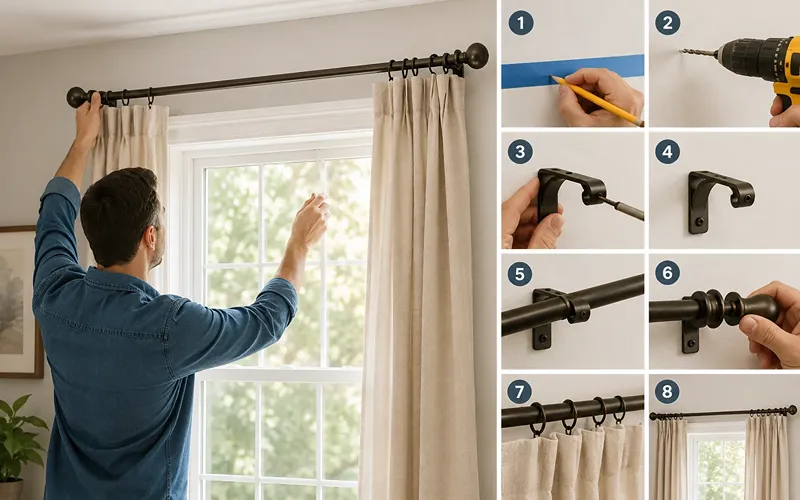
Bare windows can make even a beautifully furnished room feel unfinished. The good news is that hanging a curtain rod isn’t reserved for professional installers. With the right tools, a bit of patience, and a clear plan, you can mount a rod that looks clean, sits level, and holds up for years. This guide breaks the entire process down into eight simple steps, from gathering your tools to hanging the final panel, so you can avoid the wobbly brackets and crooked lines that trip up so many first-time DIYers.
Step 1: Gather Your Tools and Materials
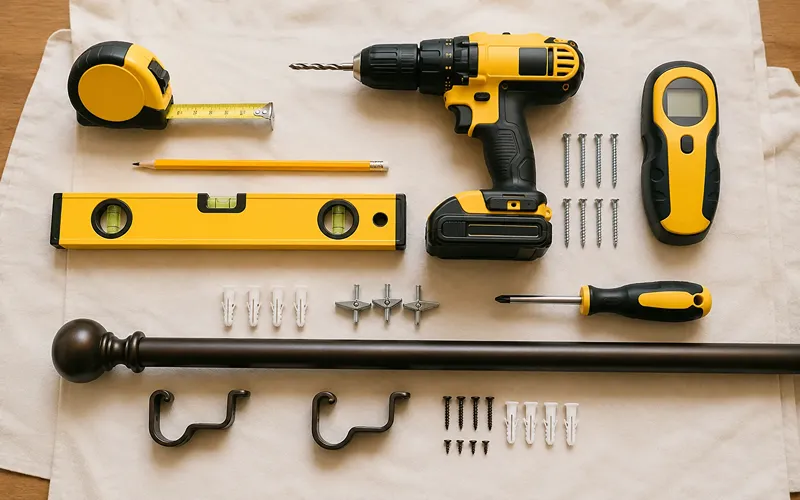
Before you touch the wall, lay out everything you’ll need. A smooth installation depends on having the right gear within reach rather than running back and forth to the garage mid-project.
You’ll typically need:
- A tape measure
- A pencil for marking
- A level (a laser level makes this even easier)
- A drill with the appropriate drill bit
- A stud finder
- Wall anchors or toggle bolts (for drywall without a stud)
- A screwdriver
- The curtain rod, brackets, and mounting hardware that came with it
If you’re working with heavier drapery like velvet curtains or lined panels, plan on using sturdier brackets and anchors rated for the added weight. Lightweight sheers, on the other hand, give you more flexibility, including no-drill options like tension rods or adhesive mounts if you’re renting and can’t drill into the wall.
Step 2: Measure Your Window Correctly
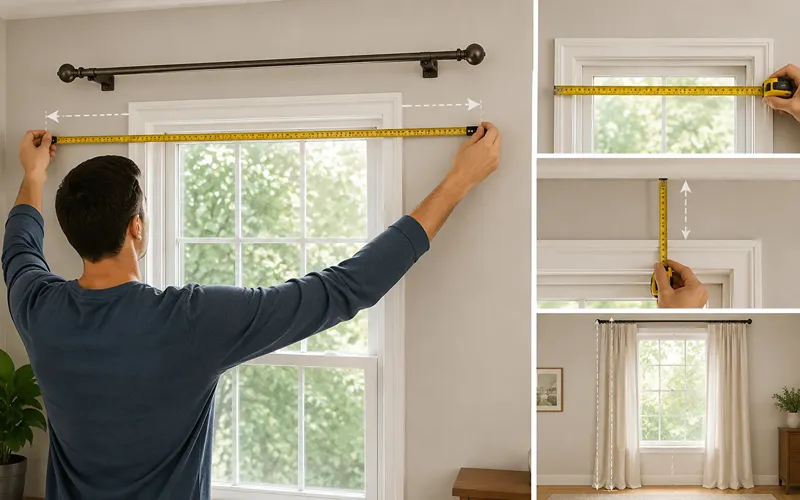
Accurate measurements are what separate a polished result from a lopsided one. Start by measuring the width of your window frame, then decide how far beyond the frame you want the rod to extend. Going 6 to 10 inches past each side is a common approach, it lets your window curtains stack neatly to the sides when open, so they don’t block natural light or make the window look smaller than it is.
Next, measure for height. A widely used rule of thumb is to mount the rod about 4 to 6 inches above the top of the window frame. If you want to create the illusion of a taller room, install it closer to the ceiling instead, the higher placement draws the eye upward and makes the whole space feel more spacious.
Don’t forget to measure floor-to-ceiling height too, especially if you’re planning on floor-length curtains. Getting this number right now saves you from re-marking your wall later.
Step 3: Mark Your Bracket Placement
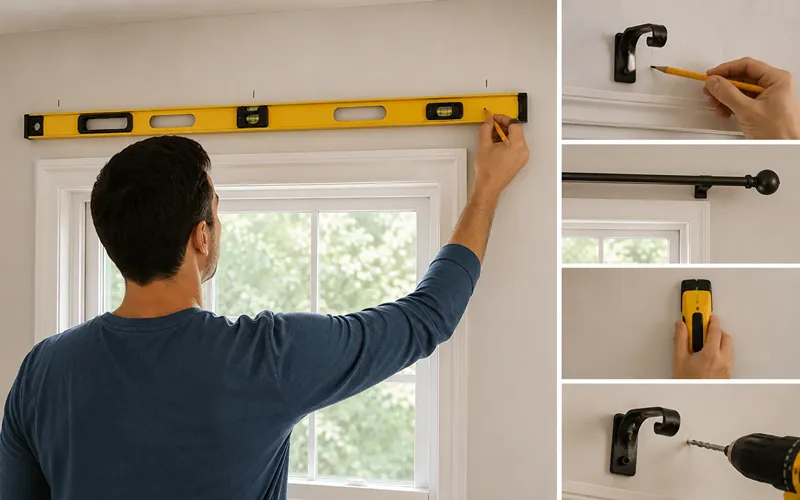
With your measurements in hand, use a pencil to mark exactly where each bracket will go. Use your level at this stage to make sure both marks sit at the same height, even a small tilt becomes obvious once the rod and curtains are hanging.
If your rod is longer than about four feet, or if you’re hanging heavier fabric, consider adding a center support bracket to prevent sagging over time. This is one of those small details that’s easy to skip but makes a noticeable difference in how long your installation stays looking sharp.
While you’re marking, run a stud finder along the wall. Mounting into a stud gives you the most secure hold, particularly for heavier blackout curtains in Dubai. When a bracket location doesn’t line up with a stud, that’s not a deal breaker, it just means you’ll rely on wall anchors instead.
Step 4: Drill Pilot Holes and Insert Anchors
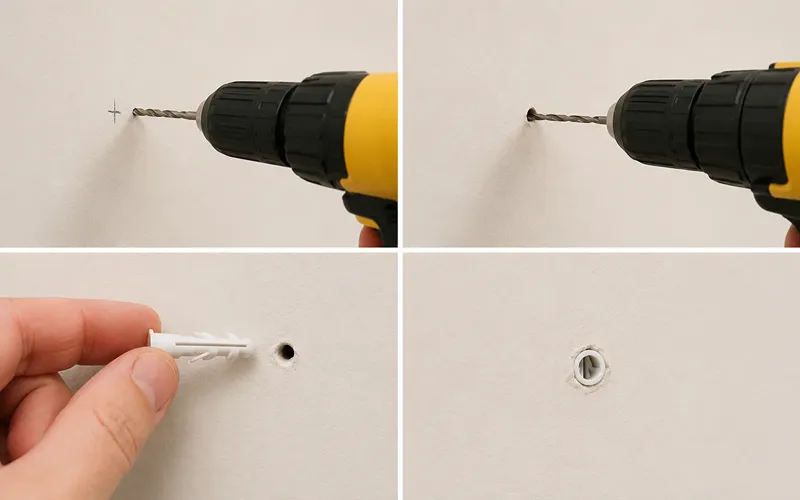
Once your marks are set, it’s time to drill. Start with small pilot holes at each marked point, this keeps your screws going in straight and reduces the risk of cracking the drywall or plaster around the hole.
If you’re not drilling into a stud, insert a wall anchor into each pilot hole before moving forward. Choose an anchor rated to handle the combined weight of your rod, brackets, and curtain panels; a wall anchor that’s undersized for the job is one of the most common reasons rods eventually pull loose.
Step 5: Mount the Brackets
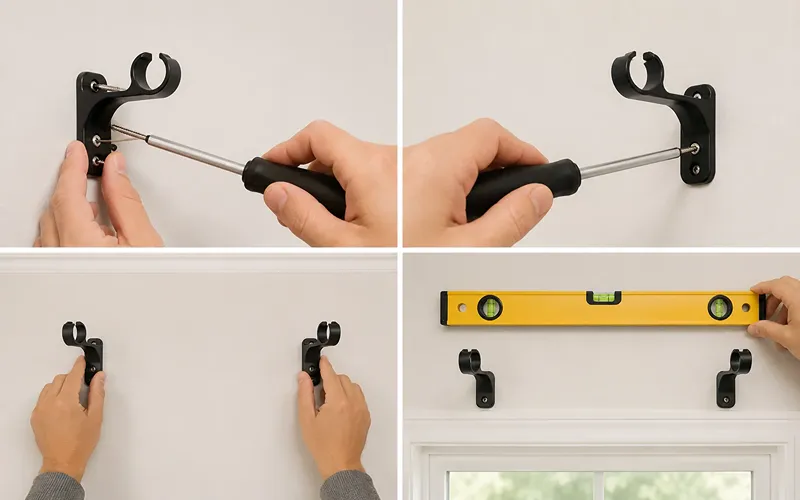
With your anchors in place, attach the brackets using the screws provided in your hardware kit. Tighten them firmly, but don’t overdo it to the point of stripping the anchor or cracking the wall surface.
Once both brackets are up, give each one a firm tug to check stability. It should feel solid, with no wobble or give. This is also a good moment to double-check that everything is level, it’s much easier to fix now than after the curtains are hanging.
Step 6: Thread Your Curtains onto the Rod
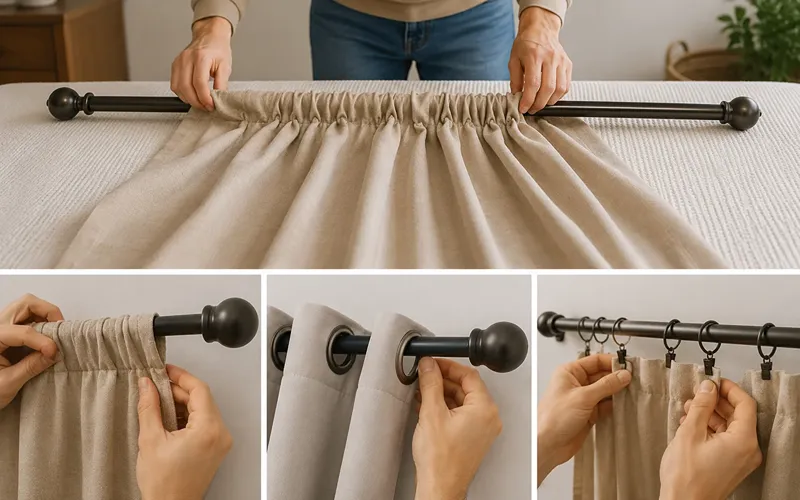
Before the rod goes up, slide your curtains onto it. How you do this depends on the curtain header style:
- Rod pocket curtains: Bunch the fabric gently and slide the rod through the built-in channel.
- Grommet curtains: Weave the rod through each metal ring, making sure the first and last grommets face the wall for a cleaner fold.
- Ring or clip curtains: Clip the rings onto the fabric first, then thread the rod through the rings themselves.
Handling this step before mounting the rod saves you from balancing on a step ladder while wrestling fabric onto a rod that’s already installed.
Step 7: Install the Rod onto the Brackets
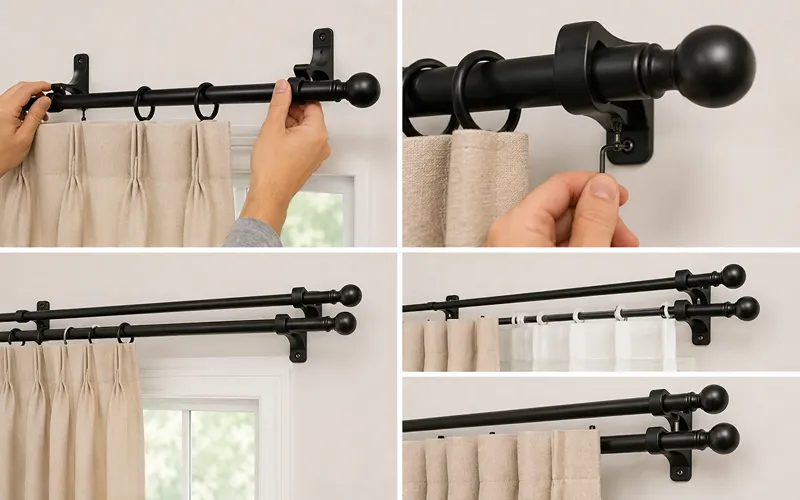
Now for the satisfying part. Lift the rod, curtains and all, and lower it carefully into the mounted brackets. Center it so the weight is balanced evenly across both sides. Many brackets include a small set screw; tighten it just enough to hold the rod snug without scratching its finish.
If you’re setting up a double curtain rod for layering sheers under heavier drapes, install the rear bracket for the sheer layer first, then the front bracket for the main curtain. Pay attention to how the two rods project from the wall, enough spacing prevents the layers from bunching or catching on each other as they’re opened and closed.
Step 8: Add Finials and Make Final Adjustments
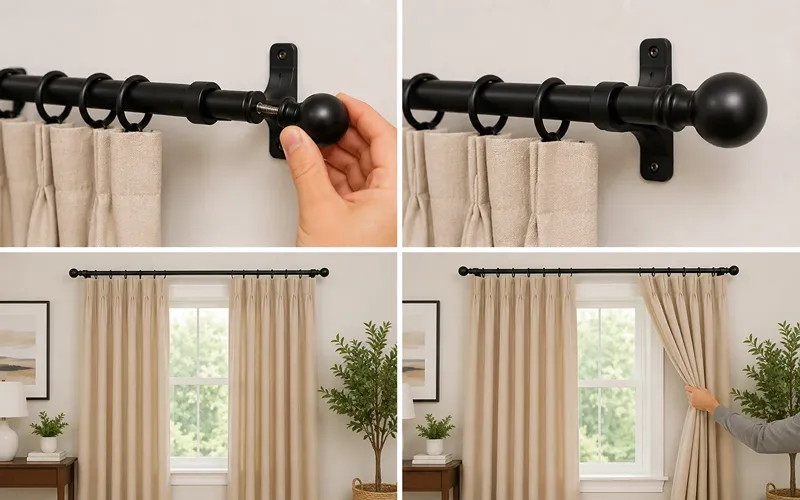
Screw on the decorative end caps, or finials, and hand-tighten until secure. Beyond looking polished, they also stop the curtains from sliding off the ends of the rod.
Step back and take a look at the full picture. Spread the panels evenly, fluff out any pleats, and slide the curtains back and forth to confirm they move smoothly without snagging on the brackets. Small adjustments here are what take an installation from “done” to “professionally finished.”
Common Mistakes to Avoid
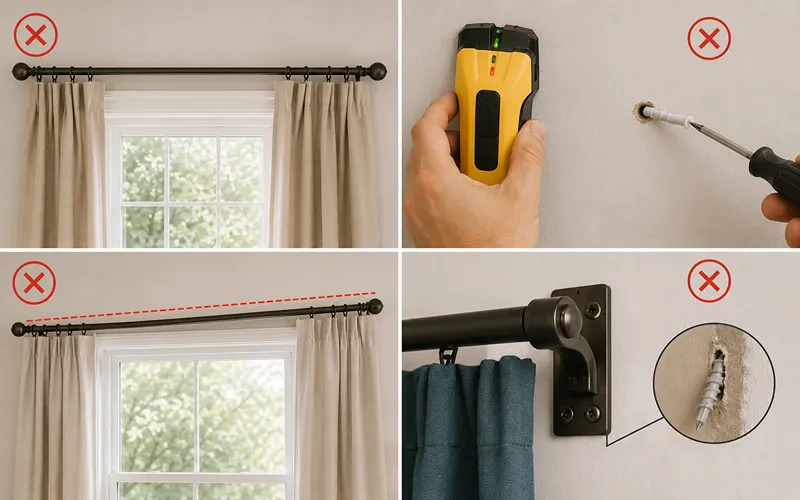
A few recurring errors catch out even careful DIYers:
- Buying a rod that’s barely wider than the window. Extending a telescoping rod to its absolute maximum weakens it and often leads to sagging in the middle.
- Skipping the stud finder. Anchors work well, but studs offer stronger support wherever they’re available.
- Ignoring the level. A rod that’s even slightly out of level becomes very noticeable once curtains are hanging.
- Underestimating weight. Heavy fabrics need reinforced brackets and properly rated anchors, not the lightweight hardware meant for sheers.
Final Thoughts
Installing a curtain rod is a project almost anyone can handle in an afternoon once you know the sequence: measure carefully, mark and drill with precision, mount securely, and finish with the small details that make the difference. Follow these eight steps, and you’ll end up with curtains that hang straight, move smoothly, and instantly upgrade the feel of the room.