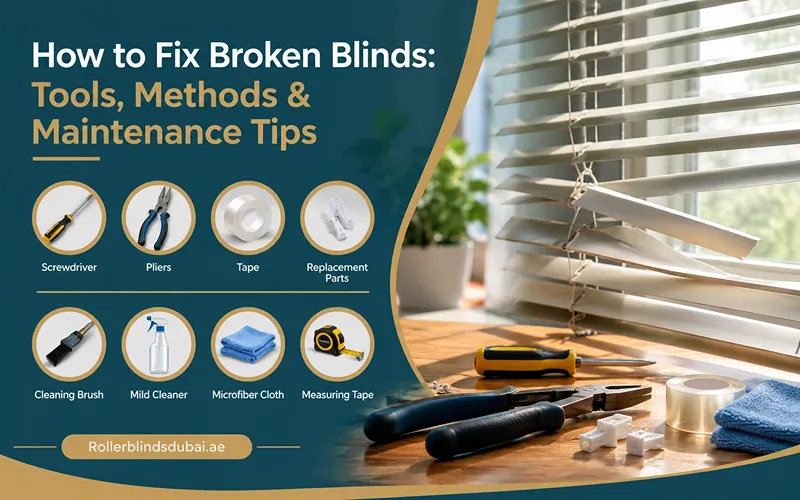
A single cracked slat can make a whole window look neglected. Worse, a stuck cord or a tilt wand that spins without doing anything can leave you with no privacy or no light at all.
The good news is that most blind problems are small and mechanical. A slat snaps, a cord frays, a knot slips, or a tiny gear inside the headrail wears out. These parts are cheap, and with a few basic tools you can replace them in under an hour.
Repairing instead of replacing makes sense for three reasons:
- It saves money. A replacement slat or tilt mechanism usually costs a few dollars, while a new custom blind can cost far more.
- It keeps the look consistent. New blinds rarely match the faded colour of the others in the room.
- It cuts waste. Fixing one part keeps a whole blind out of the landfill.
This guide explains how to fix broken blinds of all common types, including Venetian (horizontal), vertical, roller and Roman blinds. You’ll learn which tools to gather, how to handle the four most common faults step by step, and how to keep your blinds working for years. You’ll also learn when a repair isn’t worth it.
First, find the real Problem
Before you take anything apart, spend two minutes testing the blind. This tells you which part has failed.
- Slats are cracked, bent or missing: the slats themselves need repair or replacement.
- The blind won’t go up or down, or hangs crooked: look at the lift cords and the cord lock.
- Slats won’t tilt open or closed: the tilt wand or the tilt mechanism (tilter) has failed.
- A roller blind won’t roll up or won’t stay down: the spring tension or clutch is the issue.
- Vertical slats keep falling off: a slat holder (carrier clip) is broken.
Tools and Materials You’ll Need
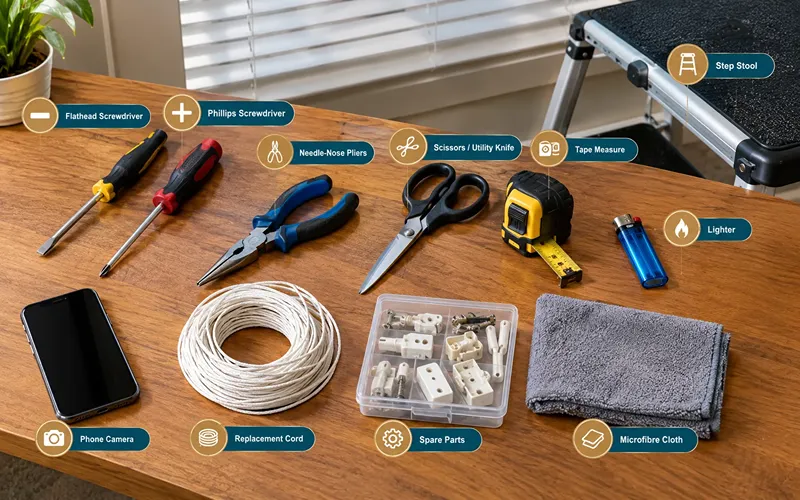
You don’t need a full workshop. Most repairs use items you already own, plus one or two inexpensive parts.
Basic tool Kit
- Flathead screwdriver: pops out end caps and bottom-rail plugs, and releases headrail brackets.
- Phillips screwdriver or drill: removes and refits brackets.
- Needle-nose pliers: grips small knots, clips and roller blinds pins.
- Sharp scissors or a utility knife: cuts cord cleanly.
- Tape measure: checks slat width and cord length before you buy parts.
- Lighter: seals the end of new cord so it doesn’t fray.
- Step stool: gives you safe access to the headrail.
- Phone camera: take photos of knots and cord paths before you take anything apart.
Materials by blind type
| Blind type | Common parts to buy | Helpful extras |
| Aluminium Venetian (mini) blinds | Replacement slats, lift cord, ladder cord, bottom-rail plugs | Rubber mallet, work gloves (slat edges are sharp) |
| Wood and faux wood blinds | Replacement slats, lift cord, tilt mechanism, tilt wand | Wood glue, clamps, fine sandpaper, touch-up stain |
| Vertical blinds | Replacement vanes (slats), slat holders/carrier clips, beaded chain, pull cord | Spare weights for fabric vanes |
| Roller blinds | Spring or clutch mechanism, end plug, beaded chain, chain connector | Pliers for the spring pin |
| Roman blinds | Lift cord, cord rings, cord lock, cleat | Needle and thread or fabric glue |
Where to get parts
Start with the manufacturer, as many sell spare slats and mechanisms. Look for a label under the headrail or on the inside of the bottom rail. Hardware stores and online blind-parts shops sell generic parts in standard sizes.
Take the old part with you, or measure it carefully. For slats, note the width (for example, 25 mm or 50 mm), length and colour. For tilt mechanisms, note the shape of the shaft hole (square, hexagon or D-shaped) and photograph both sides.
How to Fix Broken Blinds: Step-by-Step Methods
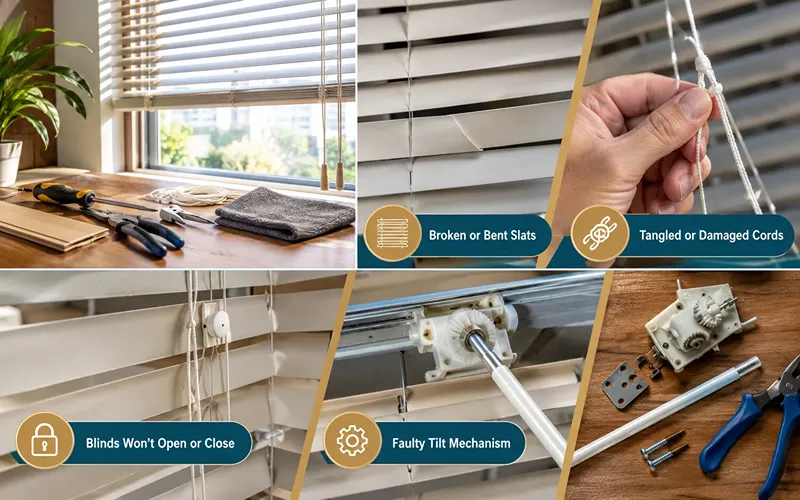
These four fixes cover most problems with horizontal blinds. Lower the blind fully and tilt the slats open before you start. If the blind is hard to reach, take it down: open the bracket covers with a screwdriver and slide the headrail out.
1. Fixing broken or bent slats
Replace a broken slat (permanent fix)
- Remove the plugs on the underside of the bottom rail with a flathead screwdriver.
- Photograph the knots, then untie the lift cords. Slide the bottom rail off.
- Pull the lift cords up and out of the slats, just past the broken slat. Leave the ladder cords in place.
- Slide out the broken slat sideways through the ladder rungs.
- Slide in the new slat with the curve facing the same way as the others.
- Thread the lift cords back down through the holes, refit the bottom rail, and retie the knots at the same length.
- Press the plugs back in and test the blind.
Don’t have a spare slat? Take one from the bottom of the blind, where it is least visible. Shorten the blind by one slat and use it to replace the damaged one higher up.
Straighten a bent Aluminium Slat
- Wear gloves and lay the slat flat on a towel.
- Gently press it back into shape with your thumbs, working from the edges toward the bend.
- For a stubborn kink, tap lightly with a rubber mallet through a cloth. Light taps work; heavy force will crease or crack the metal.
Mend a cracked wood or faux Wood Slat
Apply wood glue (or epoxy for faux wood) along the crack. Clamp it between two scrap pieces of wood for 24 hours. Sand away excess and touch up with stain if needed. A glued slat is fine for a short crack, but replace it if the break is clean through.
2. Fixing tangled or Damaged Cords
Untangle cords
- Raise the blind fully and lock it so the cords are slack.
- Work out knots with a pin or toothpick rather than pulling.
- Check inside the headrail. Cords often jump off their pulleys and twist around the tilt rod. Guide them back into place.
Replace a frayed or snapped lift cord
- Buy new cord of the same thickness and about twice the blind’s height plus its width, so you have plenty to work with.
- Remove the bottom-rail plugs and untie the old cord.
- Melt the end of the new cord with a lighter and shape it into a point. Tape it to the end of the old cord.
- Pull the old cord out from the top, and it will draw the new cord through the same path.
- Tie the new cord at the bottom rail and trim the excess. Make sure both sides are the same length so the blind hangs level.
Fix frayed ladder cords
Ladder cords hold the slats. If the strings are frayed, replace the whole ladder for that side. It clips onto the tilt drum in the headrail and slides off the bottom rail.
3. Fixing blinds that won’t open or Close
When a blind won’t go up or come down, the cord lock is usually the cause.
- Check the cord lock. Pull the cords straight down to release the lock, then let them move toward the centre of the blind. If the lock is jammed, look inside with a torch. A trapped cord or dirt stops the small toothed roller from moving. Clean it with a dry brush and a small screwdriver.
- Spray, don’t oil. A light coat of dry silicone spray helps the lock and pulleys move. Avoid oil, which attracts dust and makes things worse.
- Level a crooked blind. If one side hangs lower, the cords are uneven. Lower the blind fully and adjust the knot under the bottom rail on the low side.
- Check the brackets. A loose or bent bracket can twist the headrail and stop the mechanism. Tighten the screws and make sure the headrail sits square.
- Cordless blinds stuck? Pull the bottom rail fully down and push it all the way up two or three times. This often resets the spring motor. If it still sticks, the motor needs replacing.
4. Fixing a faulty tilt Mechanism
If the wand turns but the slats don’t move, the tilt mechanism (also called the tilter) has failed. It is a small gearbox inside the headrail, and its plastic gears wear out.
- Check the simple things first. Make sure the wand is still hooked onto the tilter. Also check that nothing is caught in the headrail, such as a cord or a fallen slat.
- Take the blind down and lay it on a flat surface.
- Remove the end cap nearest the wand. Slide the square tilt rod out of the tilter.
- Unclip the tilter from the headrail. You may need to bend a small metal tab or remove a screw.
- Take the old tilter to the shop or match it online by size, shaft shape and wand hook position.
- Clip in the new tilter, slide the tilt rod back through, and refit the end cap.
- Hang the blind and test the tilt in both directions.
For wand blinds with a broken wand hook, simply replace the wand. Slide the sleeve up, unhook the old wand, and hook on the new one.
Common Problems by Blind Type and DIY Solutions
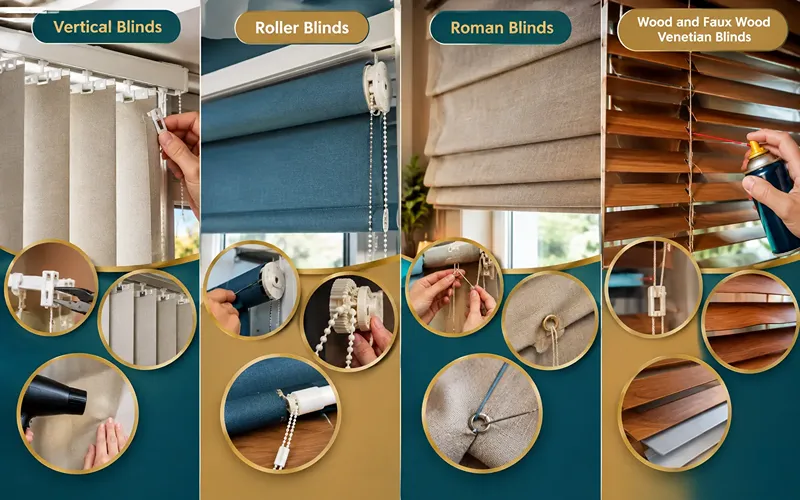
Each type of blind has its own weak spots. Here are the faults you’re most likely to meet.
Vertical blinds
- Vanes keep falling off: the plastic slat holder has cracked. Snap the old one off the carrier with pliers and press a new one in.
- Vanes won’t rotate together: one carrier gear is out of step. Turn the vanes fully open, then gently twist the odd one by hand until it clicks into line.
- Bent PVC vane: warm it with a hairdryer on low, then press it flat under a heavy book until cool.
Roller blinds
- Won’t roll up (spring blinds): the spring has lost tension. Pull the blind halfway down and lift it off the brackets. Roll it up by hand, then refit it. Repeat until it retracts properly.
- Too much tension, snaps up fast: lift it off the brackets while rolled up, unroll two turns by hand, and refit.
- Chain blind won’t move: the clutch is worn, or the chain connector has slipped. Replace the clutch at the chain end; it pulls straight out of the tube.
Take care with spring rollers. A tensioned spring can spin hard, so keep fingers clear of the pin.
Roman blinds
- Hangs unevenly: one lift cord has stretched or slipped. Lower the blind, then even out the cords at the cord lock and retie.
- Cord snapped: remove the blind and thread a new cord through the rings on the back, following your photos of the old path.
- Ring came off: stitch it back on, or use a fabric glue dot for a quick fix.
Wood and faux wood Venetian Blinds
- Heavy and hard to lift: the cord lock is strained. Clean it and use silicone spray. Always raise the slats in the open position, which puts less strain on the cords.
- Warped slats: usually caused by steam or damp in kitchens and bathrooms. Wood can’t be fully straightened, so replace those slats with faux wood.
Maintenance Tips to Prevent Future Damage
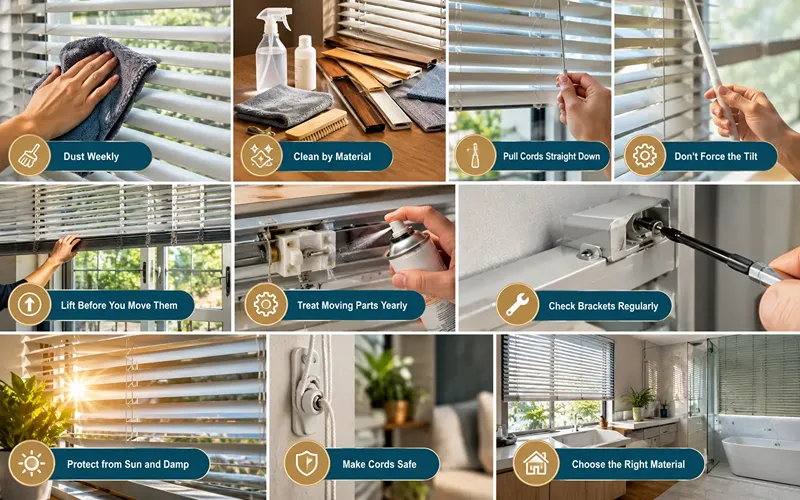
Most blind failures come from dust, rough handling and sunlight. A few habits will add years to their life.
- Dust weekly. Close the slats and wipe with a microfibre cloth or a vacuum brush attachment. Dust in the headrail is a common cause of jammed cord locks.
- Clean by material. Wipe aluminium and faux wood with a damp cloth and mild soap. Use only a dry cloth or wood polish on real wood. Spot-clean fabric vanes and Roman blinds rather than soaking them.
- Pull cords straight down. Pulling at an angle wears cords against the headrail and causes fraying.
- Don’t force the tilt. Stop turning the wand when the slats are fully closed. Over-turning strips the gears in the tilt mechanism.
- Lift before you move them. Raise blinds before opening windows or doors behind them, so wind and pets can’t catch the slats.
- Treat the moving parts once a year. A light spray of dry silicone in the cord lock and pulleys keeps them moving freely.
- Check the brackets every few months. Tighten loose screws before the headrail starts to twist.
- Protect against sun and damp. In sunny rooms, keep the slats tilted during peak hours to reduce fading. In bathrooms and kitchens, choose faux wood or aluminium rather than real wood.
- Make cords safe. Fit cord cleats or tension devices out of reach of children and pets. They prevent accidents and stop tangles too.
When to Replace Parts or Call a Professional
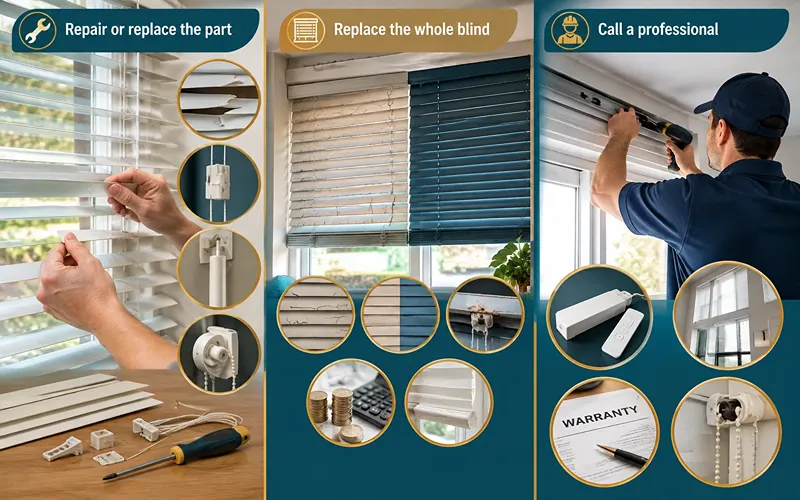
Knowing how to fix broken blinds also means knowing when to stop. Use this as a rough guide.
Repair or replace the part when:
- One to three slats are damaged and you can match them.
- A cord, tilt wand, tilter, slat holder or roller clutch has failed, but the rest of the blind is sound.
- The blind is less than about five years old and works smoothly apart from the fault.
Replace the whole blind when:
- Many slats are cracked or brittle from sun damage. If one breaks, the rest usually follow.
- The colour has faded so much that new slats would stand out.
- The headrail is bent, rusted or cracked.
- The cost of parts comes close to the price of a new blind.
- You have young children and old looped cords. Modern cordless blinds are safer.
Call a professional when:
- You have motorised blinds. Wiring, motors and remotes need a specialist, and DIY work may void the warranty.
- The blinds are large, heavy or hung high, such as on stairwells or double-height windows.
- The blind is still under warranty. Contact the manufacturer first, because a free repair beats a DIY fix.
- You’ve tried the steps above and the mechanism still slips or jams.
Conclusion: Fixing Broken Blinds Is Easier Than You Think
Now you know how to fix broken blinds without calling in help for every small fault. Start by finding the failed part, gather a few basic tools, and work slowly with your photos as a guide. Most slat, cord and tilt repairs take less than an hour and cost very little.
After the repair, a little weekly dusting and gentle handling will keep your blinds working smoothly for years. And if the damage is widespread or the blind is motorised, a professional repair or a new blind is the smarter choice.
Frequently Asked Questions
Can I fix blinds without taking them down?
Yes, for many jobs. You can replace a bottom slat, untangle cords or clean a cord lock with the blind in place. For a tilt mechanism or a full cord replacement, taking it down is easier and safer.
Why won’t my blinds stay up?
The cord lock isn’t gripping. It is usually clogged with dust or the teeth are worn. Clean it first; if it still slips, replace the cord lock.
How long do blinds last?
With regular care, most blinds last 7 to 10 years. Good wood and faux wood blinds often last longer.