Bare windows make a room feel unfinished. They let in harsh morning light, leave you on display at night and let warmth escape in winter. Curtains fix all of that, but the traditional way to hang them means a drill, wall plugs, a level and holes you will have to patch later.
That is why so many people now search for how to hang curtains without drilling. Renters want their security deposit back. Some walls are concrete, tile, or old plaster that is hard to drill cleanly. Others simply don’t own a drill or don’t want to risk hitting a pipe or cable. Homeowners like the flexibility too. You can switch curtains with the seasons, test a look before buying permanent hardware, or dress a window you are not allowed to alter. For those looking to refresh their interiors, Curtains In Dubai offer a stylish way to enhance any room without compromising its appearance.
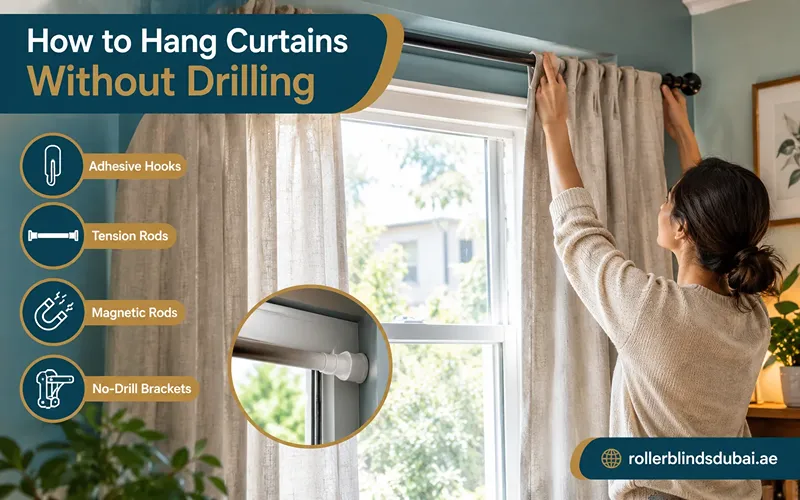
The good news is that no-drill options have improved a lot. This guide covers four reliable methods: adhesive curtain hooks, tension rods, magnetic curtain rods and no-drill curtain brackets. For each one, you will find the tools you need, step-by-step instructions, and an honest look at its strengths and limits.
Before You Start: Three Things to Check

Every no-drill method relies on pressure, adhesive, magnets or a small grip on the window trim. None is as strong as screws in a wall, so a few minutes of checking now prevents curtains crashing down later.
1. Curtain weight
Weigh your curtains on a kitchen or bathroom scale, or check the label. As a rough guide:
- Sheers and voiles: under 1 kg (2 lb) per panel
- Cotton and linen: about 1–2 kg (2–4 lb) per panel
- Blackout, thermal or velvet curtains: 2 kg (4 lb) or more per panel
Add the weight of the rod, then compare the total with the hardware’s rated capacity. Leave a safety margin of at least 25%.
2. Window type
- A recessed window (set back into the wall) suits a tension rod.
- Wooden trim around the frame suits tap-in brackets.
- A steel door or steel frame suits a magnetic rod.
- A flat wall with no recess or trim usually means adhesive hooks.
3. Wall surface
Adhesive needs a smooth, clean and sound surface. It struggles on textured paint, wallpaper, brick, flaky plaster and steamy bathroom tiles. Fresh paint is another problem: adhesive makers generally advise waiting about seven days after painting.
Basic tools for most methods
- Tape measure
- Pencil or painter’s tape for marking
- Small spirit level (or a level app on your phone)
- Isopropyl (rubbing) alcohol and a clean cloth
- Step stool
- Small hammer (only for tap-in brackets)
Method 1: Adhesive Curtain Hooks

Adhesive hooks stick to the wall and cradle a lightweight rod, just like a normal bracket. They offer the most freedom of placement, so you can mount them high above the window to make the ceiling look taller.
Choose carefully. Removable hooks with a stretch-release pull tab are designed to come off cleanly. Some cheap adhesive sheer curtain brackets use permanent foam tape with no release tab, and these can tear off paint or the paper layer of drywall. Renters should stick to the removable kind.
Tools required
- Two or three adhesive hooks rated for your curtain weight
- A lightweight rod that fits the hooks
- Isopropyl alcohol and a cloth
- Tape measure, pencil and level
Step-by-step installation
- Clean the wall with isopropyl alcohol. Avoid household sprays, which leave a slippery film. Let it dry fully.
- Mark the hook positions 10–15 cm (4–6 in) beyond each side of the window frame, so open curtains stack clear of the glass. Check both marks with a level.
- Peel the backing and press each hook firmly for about 30 seconds.
- Wait before loading. Most makers suggest at least one hour; overnight is safer for heavier fabric.
- Thread the curtains onto the rod and lay it in the hooks. On windows wider than about 90 cm (36 in), add a third hook in the middle to stop sagging.
Advantages
- No holes when removed correctly
- Can go anywhere on a smooth wall, at any height
- Cheap and quick to install
Limitations
- Low capacity: large hooks are usually rated at roughly 2–4.5 kg (5–10 lb) each, and that rating assumes a steady downward load. Opening and closing curtains adds extra tugging.
- Unreliable on textured, freshly painted or humid surfaces
- Bulky hooks can peek out above the curtain heading
- Best for sheers and light cotton, not heavy blackout drapes
Method 2: Tension Rods

A tension rod is a telescopic pole that presses outward against both sides of a window recess. Nothing is glued or screwed; pressure alone holds it. That makes it the most damage-free choice for recessed windows.
There are two main designs. Spring tension rods use an internal spring and suit light fabric. Twist-lock tension rods tighten as you turn them, grip harder and handle medium-weight curtains better.
Tools required
- Tension rod sized for your recess
- Tape measure
- Optional: rubber or silicone end pads for extra grip
Step-by-step installation
- Measure the inside width of the recess at the top, middle and bottom. Use the smallest figure.
- Pick a rod whose size range puts your measurement near the middle. A rod stretched to its maximum length is at its weakest.
- Slide the curtains onto the rod.
- For a spring rod, extend it 1–2 cm (about ½ in) longer than the opening, compress it and fit it in place. For a twist-lock rod, extend it until it touches both sides, then twist until snug.
- Check it with a level, then give the curtain a gentle tug. If the rod moves, tighten slightly or add grip pads.
Advantages
- No adhesive, no holes and no marks
- Installs in a few minutes and is easy to reuse
- Inexpensive; ideal for bathrooms, kitchens, café curtains and dorm windows
Limitations
- Only works inside a recess or between two solid, parallel surfaces
- Long spans sag, especially beyond about 120 cm (48 in) with heavier fabric
- Can slip over time and may need re-tightening
- Sits inside the recess, so it can clash with inside-mounted blinds and lets light leak at the edges
- Overtightening can bow the rod or dent soft frames
Method 3: Magnetic Curtain Rods

Magnetic rods have strong magnets built into their end brackets. They snap onto steel and lift off just as easily, which makes them ideal for steel entry doors, steel French doors and metal window frames.
The key word is steel. Magnets will not grip aluminium, wood, uPVC or plaster, and many stainless steels are only weakly magnetic. Since a lot of modern frames are aluminium or uPVC, test first: if a fridge magnet sticks firmly, a magnetic rod should work.
Tools required
- Magnetic rod (or a top-and-bottom pair for doors)
- A fridge magnet for testing
- Tape measure
- Optional: thin felt pads or clear protective tape to prevent scratches
Step-by-step installation
- Test each planned bracket spot with a fridge magnet.
- Wipe the metal clean. Grit trapped under a magnet can scratch paint.
- Adjust the rod to the width you want to cover and thread on the curtain.
- Hold the rod level and let the magnets snap into place. To adjust, lift and reposition rather than dragging.
- On doors, add a second rod at the bottom so the curtain doesn’t swing when the door opens.
Advantages
- No tools, adhesive or holes
- Installs in seconds and lifts off for washing
- Firm hold on a suitable steel surface
Limitations
- Works only on steel
- Capacity varies widely between models, so always check the rating
- Can slide out of line if bumped, especially on busy doors
- Best for narrow spans such as door glass, not wide windows
Method 4: No-Drill Curtain Brackets

No-drill brackets are the closest thing to a standard curtain rod setup without a drill. The most common type is the tap-in bracket. It sits over the top corner of wooden window trim, and short built-in pins are tapped into the top edge of the trim with a hammer. The bracket then holds an ordinary curtain rod.
To be clear, “no-drill” does not mean “no mark.” The pins leave tiny holes, similar to drawing pins, on the top edge of the trim where nobody looks. They are far smaller than screw holes, but check your lease if it bans holes of any kind.
Tools required
- A pair of no-drill brackets (single, or double for layering sheers and blackout curtains)
- A curtain rod of the diameter the brackets accept
- Small hammer and step stool
- Optional: a centre support bracket for wide windows
Step-by-step installation
- Check your trim. These brackets need flat wooden trim within the width the maker specifies, commonly about 1.3–2.5 cm (½–1 in). Most are not recommended for MDF, PVC, metal or very hard woods such as oak.
- Place a bracket on the top corner of the trim so it sits flush on the top and the face.
- Tap gently until snug, then repeat on the other side. The trim acts as a guide, so the brackets line up without measuring.
- Thread the curtains onto the rod and set it into the brackets.
- On windows wider than about 150 cm (60 in), add a centre support to prevent sagging.
To remove them, lift or gently lever the bracket straight up. A dab of wood filler or paint hides the pinholes.
Advantages
- Strongest of the four methods; popular models are rated by their makers at up to about 9 kg (20 lb) per bracket
- Handles blackout and thermal curtains
- Quick to fit with no measuring, and reusable
- Sits outside the recess, so blinds keep working
Limitations
- Needs suitable wooden trim
- Curtain height is fixed at the top of the trim, so you can’t hang them higher
- Leaves pinholes, which may matter under strict leases
How to Choose the Right No-Drill Method
Start with your window and wall surface, then check your curtain weight. This table sums up where each method fits best.
| Method | Best surface | Curtain weight | Leaves marks? | Install time |
| Adhesive hooks | Smooth, painted wall | Light | None, if removable strips are used | 5 min + 1 hr curing |
| Tension rod | Inside a window recess | Light to medium | None | About 5 min |
| Magnetic rod | Steel door or frame | Light to medium (check rating) | None, if paint is protected | Under 2 min |
| No-drill brackets | Wooden window trim | Medium to heavy | Tiny pinholes on top of trim | Under 5 min |
Quick decision guide
- Heavy blackout or thermal curtains: no-drill brackets on wooden trim. With no trim, use a heavy-duty twist-lock tension rod across a short recess.
- Recessed window: a tension rod is the simplest choice.
- Flat wall, no trim, light curtains: adhesive hooks.
- Steel front door or patio door: magnetic rods, top and bottom.
- Textured or freshly painted wall: skip adhesive and use a tension rod or trim brackets.
- Bathroom or kitchen: a tension rod, because humidity weakens adhesive over time.
- You want curtains hung high and wide: adhesive hooks are the only option here that lets you choose the height freely, so pair them with lightweight fabric.
Common Mistakes to Avoid

- Skipping surface prep. Dust, grease and cleaning sprays are the main reason adhesive fails. Clean with isopropyl alcohol and let it dry.
- Loading hooks too soon. Give the adhesive its full curing time before hanging anything.
- Ignoring weight ratings. Weigh the curtains and rod together, and leave a safety margin.
- Buying a tension rod at its maximum length. A fully extended rod sags and slips more easily.
- Overtightening tension rods. Too much pressure bows the rod and can dent soft frames.
- Using magnets on aluminium or uPVC. Always test with a fridge magnet first.
- Pulling adhesive hooks outward. Stretch the release tab slowly downward, parallel to the wall.
- Forgetting centre support. Long rods sag in the middle whatever the method.
- Not reading your lease. Some agreements ban adhesives or pinholes on certain surfaces.
- Yanking curtains open. Pull from the leading edge or use tiebacks so you don’t jerk the hardware loose.
Conclusion: Which No-Drill Method Should You Choose?
Knowing how to hang curtains without drilling comes down to matching the method to your window, wall and fabric. Use a tension rod for recessed windows and adhesive hooks for light curtains on smooth walls. Choose magnetic rods for steel doors and frames, and no-drill brackets when you have wooden trim and heavier curtains. Prepare the surface, respect the weight limits and check your lease. Do that, and your curtains will stay up while your walls stay intact.
Frequently Asked Questions
Can no-drill methods hold heavy blackout curtains?
Yes, if you pick the right one. Tap-in brackets on wooden trim are the strongest option. A heavy-duty twist-lock tension rod can also work across a short recess. Standard adhesive hooks are a poor match for heavy panels.
What is the best no-drill option for renters?
A tension rod leaves no trace at all, so it is the safest choice if you have a recess. Removable adhesive hooks come next. Tap-in brackets leave tiny pinholes on top of the trim, so check your lease first.
Will adhesive hooks damage my walls?
Removable hooks with a pull tab are designed to come off cleanly when removed slowly. Damage usually comes from permanent foam-tape brackets, fresh paint, or pulling hooks outward instead of stretching the tab.
Do adhesive hooks work on textured walls or tiles?
Not reliably on textured walls, because the adhesive touches less surface. Smooth tiles can work in dry rooms, but steam gradually weakens the bond.
How do I stop a tension rod from slipping?
Make sure your recess width sits in the middle of the rod’s range, add rubber end pads and re-tighten every few weeks. If it still slips, switch to a twist-lock rod or lighter curtains.
Can I hang curtains over blinds without drilling?
Yes. Tap-in brackets and adhesive hooks both sit outside the recess, so inside-mounted blinds keep working.
Do these methods work for outdoor curtains?
Mostly not. Outdoor curtains catch wind, which pulls hardware sideways. Heavy-duty tension rods between solid walls or clamp-on hardware are safer outdoors than adhesive hooks.